Almost every developer must set up multiple different GitHub accounts on one pc. It feels like a little bit of hassle when we try to set up it for the first time. Today I will try to describe it in easy.\ let's jump into it.
Step 1:
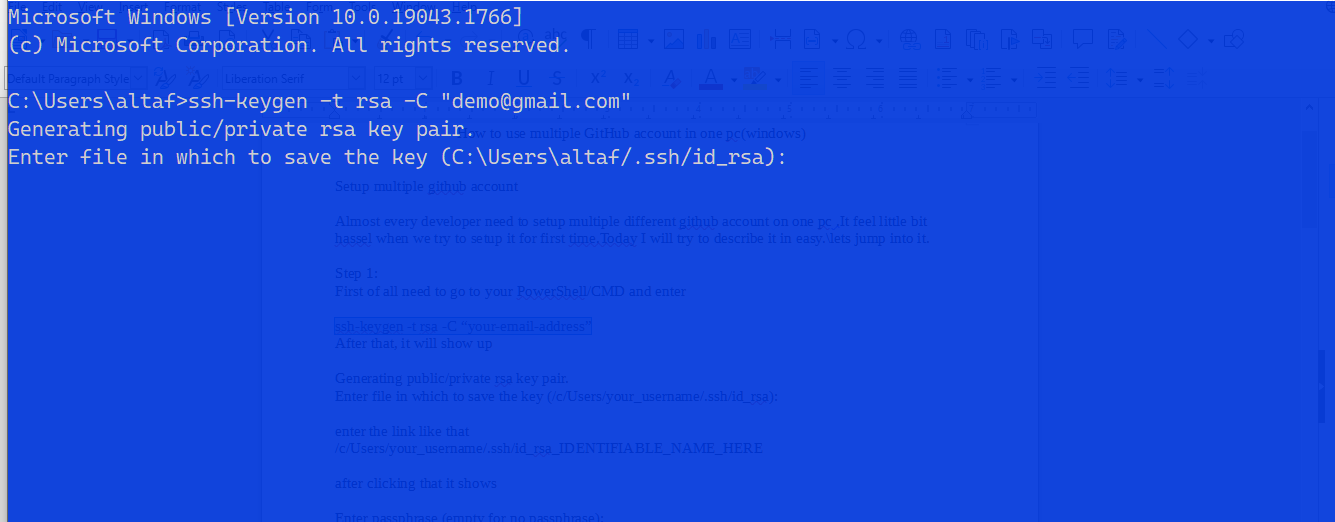
First of all, you need to go to your PowerShell and enter.
ssh-keygen -t rsa -C “your-email-address”
After that, it will show up

Step 2:
After that copy, the below text and paste that into your your_username write your one. Need to run this command as par as you try to set up new GitHub accounts. In this example, I try to show two different accounts one for personal one and the other for office or anything else.
/c/Users/your_username/.ssh/id_rsa
For the second one. Here IDENTIFIABLE_NAME_HERE is as you want to rename it like office or etc.
/c/Users/your_username/.ssh/id_rsa_IDENTIFIABLE_NAME_HERE
Note: You have to follow the same steps twice as you set two different accounts. So first create id_rsa one and follow all setup steps and then came back and follow id_rsa_IDENTIFIABLE_NAME_HERE one first to bottom. Don't try to create both once try one by one.
Step 3:
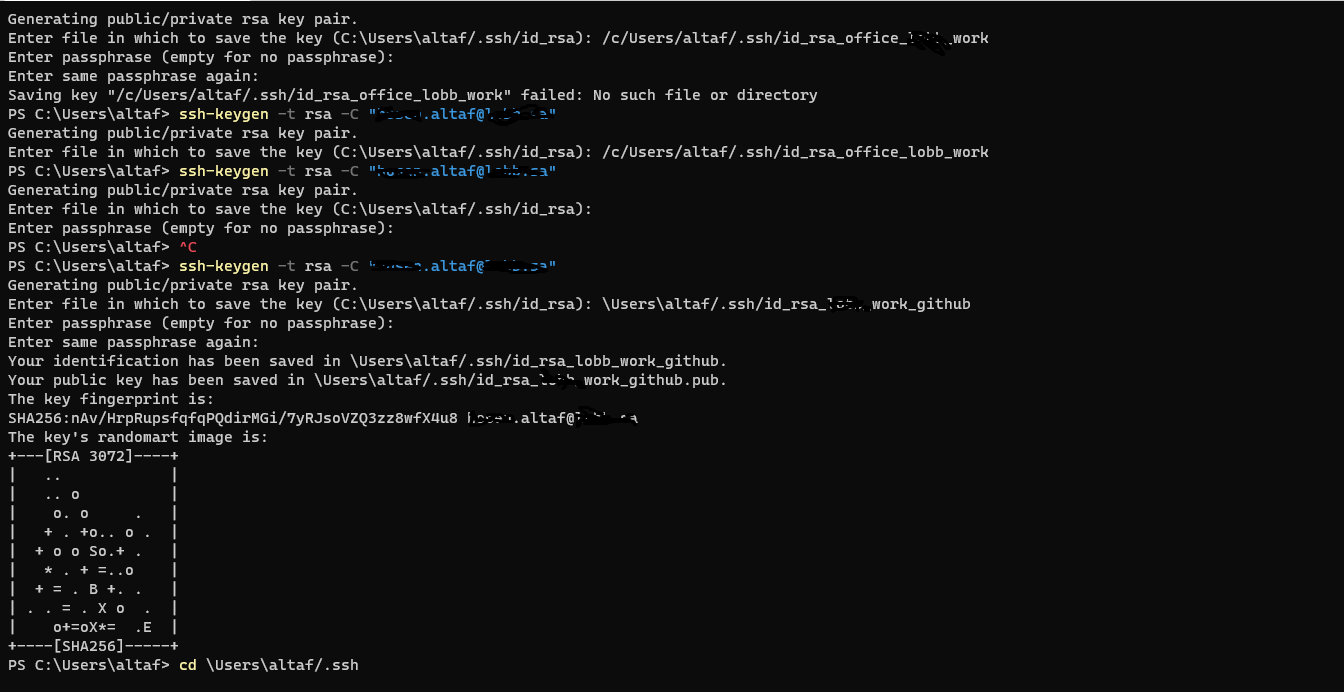
After clicking that it will show this
Enter passphrase (empty for no passphrase):
Enter the same passphrase again:
you can just hit enter two times and leave it blanks as it is. It will generate a key you can see if you go to the .ssh file let's go. You will see similarities in your command line

Step 4:
After that just copy the like me and get into the .ssh file
cd \Users\your_username/.ssh
You should be able to see your new SSH key file. As you can see in my one I have both id_rsa_test and id_rsa_test.pub. id_rsa_test is your private key stored on your machine, whilst id_rsa_test.pub is the public key that you will provide GitHub with.
Step 5:
Next, you need to copy the SSH key which is stored in the id_rsa_test.pub file. You can open this in a text editor of your choice. I am currently using VS CODE so I opened the file using the following command:
code .
Step 6:
You will then get something similar in the .pub file to this it is ssh-rsa don't copy this copy your one :
AAAAB3NzaC1yc2EAAAADAQABAAABAQDEmSbc7ms4SNIf7G0e9EqdrQRTB17VFTqRtCbQ55sSc11xZP5B07UXf9+................a955cf1GUzsNIr60E7VuVxirrr+K2WcleqifnDEg1H/VbyJtEekh4Aav9csBwemTz3 test@test.com
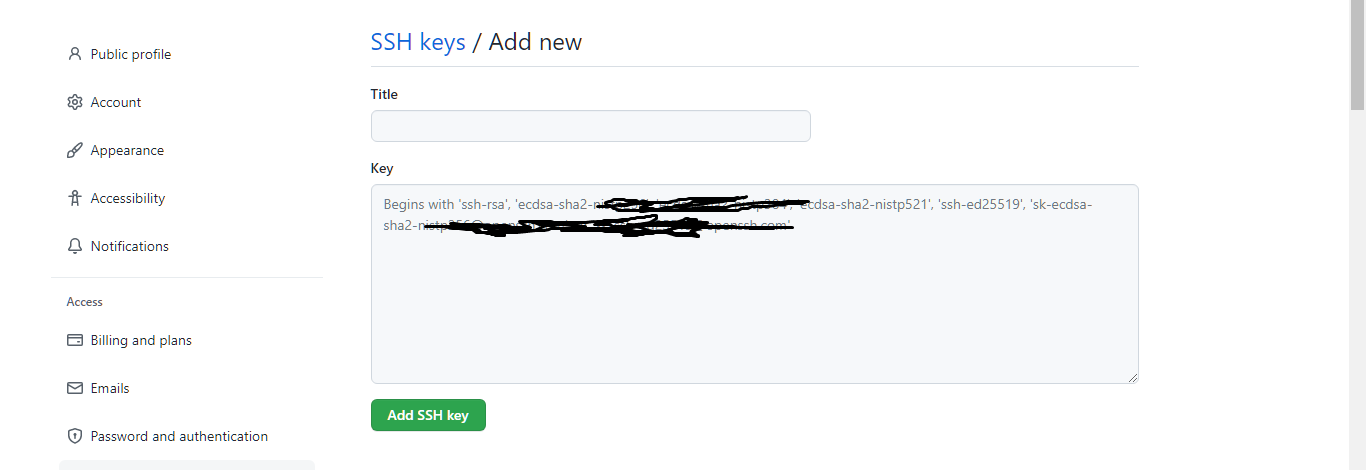
Copy this and navigate to your GitHub account → Settings → SSH and GPG keys

Give your new key a title and then paste the newly generated SSH key you copied before. It is a good idea to name your keys after the machine they’re from.
Step 7:
Create a config file in .SSH folder we just created. The SSH config file allows us to set configuration rules that will specify when we want to push to our work account versus our account. This is done by defining which identity file to use ( the ones we’ve added to our SSH agent ) on which domain. Write down it like this
# Account 1 (work or personal) - the default config

Host personal_GitHub

HostName github.com

User git

IdentityFile ~/.ssh/id_rsa


# Account 2 (work or personal) - the config we are adding

Host office_github

HostName github.com

User git

IdentityFile ~/.ssh/id_rsa_writeyourone
The top part is the default configuration. It comprises the following:
the host personal_GitHub/office_github
Its host name (github.com)
a user ID (git)
its identity file (~/.ssh/id_rsa)
We can duplicate the default configuration; we’ll only need to change two things: the host
(GitHub-your account) and the identity file (to the key we created earlier, ~/.ssh/id_rsa_youraccount).
That's it our configuration is complete. We are ready to go.
Step 8:
cloning GitHub repo
original ssh link from GitHub
git@github.com:demo2022/test.git
we need to change that like this
git clone git@office_github:demo2022/test.git
the office is a hostname
You should now be able to commit and push.
git init
git add.
git commit -m "First commit"
git remote add origin git@github.com:your_username/test.git
git push origin master
Conclusion
I tried to explain everything in the easy and right way. Hope if you follow the steps you can successfully run the GitHub setup.
Learn How to deploy django application in shared hosting
Learn How to develop a full stack development project from planning to coding
 Hosen MD Altaf

YwIwiZDlcQ
Sept. 22, 2024, 11:01 p.m.None
ReplyWliyZqFORyHuN
Oct. 13, 2024, 1:45 p.m.None
ReplyUKWouVbUHtscL
Oct. 19, 2024, 1:24 a.m.None
ReplyjanSTMBtnvNjk
Oct. 23, 2024, 2:55 a.m.None
ReplysIqYqpAQFNiB
Oct. 26, 2024, 2:16 p.m.None
Reply