 Hosen MD Altaf
In almost every project we need rich text editor integration for writing content. Such as blog details, and product descriptions everywhere we need a rich text editor. I wrote another blog post about a very lightweight rich text editor called summernote here. Today we discuss one very popular rich text editor named CKEditor.Let's start our journey by exploring how to integrate CKEditor into our Django application.
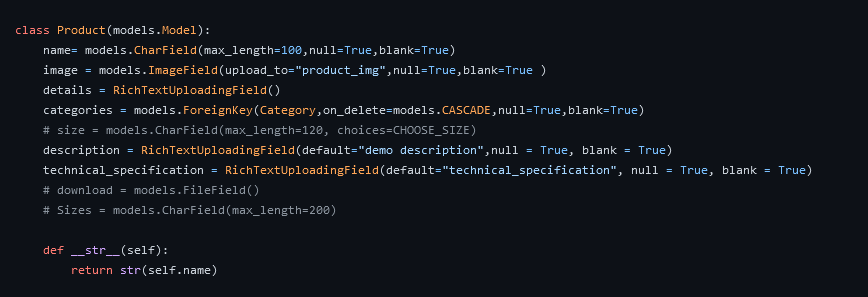
Here is an Example model for you to understand our below code better way
1. First of all install django-ckeditor in our project
pip install django-ckeditor
2. Then configure it project setting in INSTALLED_APPS
INSTALLED_APPS = [
'ckeditor',
 ]
3. After that we need to add it to our project main urls.py file
from django.conf import settings
from django.conf.urls.static import static

urlpatterns = [
    path('admin/', admin.site.urls),
    path('ckeditor/', include('ckeditor_uploader.urls')),
]
4. In development mode
when DBUG="True" these two import is essential otherwise django_summernote will not work properly. In the main urls.py file need to add
from django.conf import settings
from django.conf.urls.static import static

if settings.DEBUG:
    urlpatterns += static(settings.MEDIA_URL, document_root=settings.MEDIA_ROOT)
5. Setup RichTextField the model field in the Django model
from django.db import models
from ckeditor_uploader.fields import RichTextUploadingField

class Product(models.Model):
    name = models.CharField(max_length=255)
    content = RichTextUploadingField()
6. Required widget with file upload capabilities in settings.py setup
When using default file system storage, images will be uploaded to the “uploads” folder in your MEDIA_ROOT and urls will be created against MEDIA_URL (/media/uploads/image.jpg).
CKEDITOR_UPLOAD_PATH = "ckeditor"
7. Need to migrate our database to prepare django-ckeditor
python manage.py migrate
8. Collect static files before publishing or developing.
python manage.py collectstatic
9. Render data in the template
To show the CKEditor create HTML to the user-readable text we need to use Django's built-in template tag safe. Here is how it needs to be used, content is a model field.
{{ content | safe }}
That's it for most of the work. You are ready to go. If you want more here are some powerful recipes for you.
10. For using the widget in the form field with the help of CKEditorWidget
from django import forms
from django.contrib import admin
from ckeditor.widgets import CKEditorWidget

from product.models import Product

class ProductAdminForm(forms.ModelForm):
    content = forms.CharField(widget=CKEditorWidget())
    class Meta:
        model = Product

class ProductAdmin(admin.ModelAdmin):
    form = ProductAdminForm

admin.site.register(Product, ProductAdminForm)
11. For using outside of Django admin
For rendering a form outside the admin panel, we have to make sure all form media is present for the editor to work. There are two ways.
<form>
    {{ myform.media }}
    {{ myform.as_p }}
    <input type="submit"/>
</form>
OR we can load the media manually
{% load static %}
<script type="text/javascript" src="{% static "ckeditor/ckeditor-init.js" %}"></script>
<script type="text/javascript" src="{% static "ckeditor/ckeditor/ckeditor.js" %}"></script>
12. Add the required plugin
Additional if you want more options in your CKEditor - you can customize the CKEditor editor.There are a lot of options you can change according to your requirement
CKEDITOR_CONFIGS = {
    'default': {
        'skin': 'moono',
        # 'skin': 'office2013',
        'toolbar_Basic': [
            ['Source', '-', 'Bold', 'Italic']
        ],
        'toolbar_YourCustomToolbarConfig': [
            {'name': 'document', 'items': ['Source', '-', 'Save', 'NewPage', 'Preview', 'Print', '-', 'Templates']},
            {'name': 'clipboard', 'items': ['Cut', 'Copy', 'Paste', 'PasteText', 'PasteFromWord', '-', 'Undo', 'Redo']},
            {'name': 'editing', 'items': ['Find', 'Replace', '-', 'SelectAll']},
            {'name': 'forms',
             'items': ['Form', 'Checkbox', 'Radio', 'TextField', 'Textarea', 'Select', 'Button', 'ImageButton',
                       'HiddenField']},
            '/',
            {'name': 'basicstyles',
             'items': ['Bold', 'Italic', 'Underline', 'Strike', 'Subscript', 'Superscript', '-', 'RemoveFormat']},
            {'name': 'paragraph',
             'items': ['NumberedList', 'BulletedList', '-', 'Outdent', 'Indent', '-', 'Blockquote', 'CreateDiv', '-',
                       'JustifyLeft', 'JustifyCenter', 'JustifyRight', 'JustifyBlock', '-', 'BidiLtr', 'BidiRtl',
                       'Language']},
            {'name': 'links', 'items': ['Link', 'Unlink', 'Anchor']},
            {'name': 'insert',
             'items': ['Image', 'Flash', 'Table', 'HorizontalRule', 'Smiley', 'SpecialChar', 'PageBreak', 'Iframe']},
            '/',
            {'name': 'styles', 'items': ['Styles', 'Format', 'Font', 'FontSize']},
            {'name': 'colors', 'items': ['TextColor', 'BGColor']},
            {'name': 'tools', 'items': ['Maximize', 'ShowBlocks']},
            {'name': 'about', 'items': ['About']},
            '/',  # put this to force next toolbar on new line
            {'name': 'yourcustomtools', 'items': [
                # put the name of your editor.ui.addButton here
                'Preview',
                'Maximize',

            ]},
        ],
        'toolbar': 'YourCustomToolbarConfig',  # put selected toolbar config here
        # 'toolbarGroups': [{ 'name': 'document', 'groups': [ 'mode', 'document', 'doctools' ] }],
        # 'height': 291,
        # 'width': '100%',
        # 'filebrowserWindowHeight': 725,
        # 'filebrowserWindowWidth': 940,
        # 'toolbarCanCollapse': True,
        # 'mathJaxLib': '//cdn.mathjax.org/mathjax/2.2-latest/MathJax.js?config=TeX-AMS_HTML',
        'tabSpaces': 4,
        'extraPlugins': ','.join([
            'uploadimage', # the upload image feature
            # your extra plugins here
            'div',
            'autolink',
            'autoembed',
            'embedsemantic',
            'autogrow',
            # 'devtools',
            'widget',
            'lineutils',
            'clipboard',
            'dialog',
            'dialogui',
            'elementspath'
        ]),
    }
}
Conclusion:
There is a lot we covered here. It's enough for using CKEditor in any Django project. For more details, I suggest the following official docs.
Learn How to deploy django application in shared hosting
Learn How to integrate django summernote WYSIWYG Editor in Django
Learn How to develop a full stack development project from planning to coding


There is no comment yet!